White Balance (photoshop tutorial)

I hope someone out there read the last tutorial, and I hope you learned something from it! Today I'm going to talk about that same image, and what you could do to make it even better.

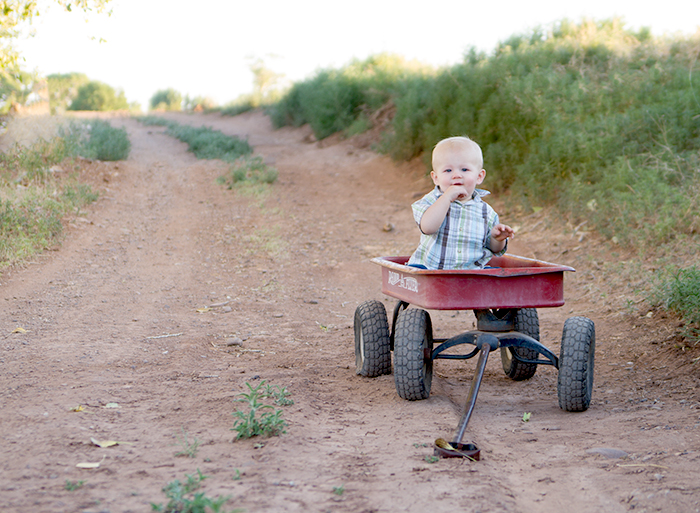
This is our finished image from the last tutorial.  If you look at this image, yeah it's cute...but it's not "there" yet. It's missing something yes?


We need to fix something called white balance.  This image is too cool.  I'm going to show you a couple quick fixes for that.

The best thing you could do is shoot in RAW, and correct this in ACR or Lightroom.  It's a super easy fix, all you have to do is play with the temperature slider until it looks the way you want it too.  But, I'm writing this tutorial so it can help more people than those of us with DSLR's and the space to store RAW files.

Anyway...

If you feel your image is too cool, open up your image in photoshop.  Open up a Levels layer just like I showed you in the last tutorial.  This time find the white eyedropper.

Now find something white in the image.  Click on it.  You should see your image change instantly.

Ahhh!  Much better!  This method can be finicky though.  Sometimes it can be really extreme, and overly brighten skin tones.  So make sure you play with the opacity of the layer until you feel it looks right.

If that method just isn't working, you can try this way as well.  One thing I love about photoshop is that there are a million ways to accomplish something.  As you get more comfortable with photoshop you'll find what works better for you.  Go to your adjustment layers again (that ying yang looking symbol) and open up color balance.  Drag the first slider more towards red, and the last slider more towards yellow.  


I prefer this method because I feel like I have more control over what I'm doing.

Here's before and after:


 See the difference it can make!  Amazing!

White balance is extremely important to a getting a good image.  We've only just barely scratched the surface here, but I hope this helps someone out there and let me know if you have any questions!


Pin It

3 Step Edit (Photoshop Tutorial)


I've been saying that I would write a tutorial for awhile now, and tonight I finally got around to doing it! I had a lot of fun doing it too, so let me know how you like it. It's a basic 3 step way to process your photos in photoshop.

First we are going to start with a SOOC (straight out of camera) image. I chose this image because it already had decent exposure and the model is super cute.


Open the image in PS.  If you have Elements, I'm fairly certain these steps will be the same.  But I've never edited with PS Elements, so I can't be positive.

In the bottom right hand corner you will see your layers pallet.  Click on the ying-yang looking symbol and this will bring up a list of adjustment layers.  Choose "Levels".


This will bring up a box that looks like this:


Now drag the shadows slider to the right until it hits the edge of the hill (histogram).  You will see your image getting contrast.  Then move the midtones slider a little to the left or until your image is as bright as you want it to be.

After levels adjustment:


Now click on the ying-yang symbol again and this time choose "Hue/Saturation".  You'll see a few different sliders here.  Change the saturation from 0 to 20.  You should see the colors in your image pop.

After saturation adjustment:


Now it's time for the last step, but first we need to flatten this image.  Go to Layer>Flatten Image.


Now that the image is flattened, we are going to do some burning to the background to make the subject pop.  I prefer to do this on a separate layer so hit "Command J" on a Mac or "Ctrl J" on a PC (correct me if I'm wrong there) to make a duplicate layer.  I like to do this so if I go a little heavy on my burning I can simply lower the opacity of the layer later.

Now select the Burn tool.  It looks like a hand.  If you don't see it at first look for an icon that looks like an opaque magnifying glass (but NOT the magnifying glass that's an entirely different tool).  If you click on the little arrow in the corner and menu will pop up and your burn tool will be in those tools.  Now set the exposure of the burn tool to 30% and start painting over the areas of the image you want darkened.


After Burn tool:


This may be a tad heavy handed, but I wanted you to really see the difference.

And Voila!  You're done!

Please let me know if you have any questions and I will do my best to answer them!

Did you like this tutorial?  Would you like to see more? I really enjoyed writing this tutorial and since it's summer now and sessions have slowed, I would be happy to write some more.  Let me know what types of tutorials you would want to see!  Comment below!

Pin It

My boy!

I took these pictures for my last assignment in my creative processing class. I loved every minute of that workshop! I learned so much and my instructor was beyond amazing. I had a clear vision for what I wanted out of these pictures, and with the help of my brother Jared it came to life. These were taken last week when I was visiting my family in Snowflake, and my brother was on the phone for an hour trying to hunt down a radio flyer wagon for me. I'm so glad he did! Thanks bro!


Pin It

My kids

I took these pictures earlier this week so I could have more pictures to play with in my photoshop workshop, and seeing as it's Father's Day I thought today would be an appropriate day to post them! Enjoy these cute pictures of my kids!


She felt it was her job to make her little brother stay in the shot.  hehe.


Pin It