


I've been saying that I would write a tutorial for awhile now, and tonight I finally got around to doing it! I had a lot of fun doing it too, so let me know how you like it. It's a basic 3 step way to process your photos in photoshop.
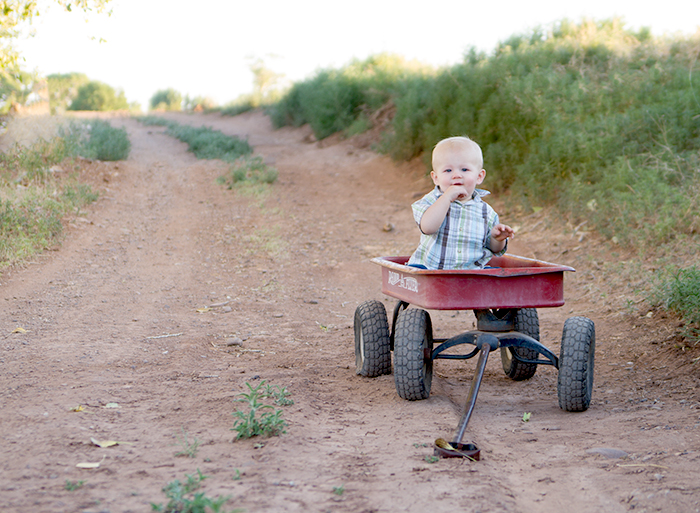
First we are going to start with a SOOC (straight out of camera) image. I chose this image because it already had decent exposure and the model is super cute.

Open the image in PS. If you have Elements, I'm fairly certain these steps will be the same. But I've never edited with PS Elements, so I can't be positive.
In the bottom right hand corner you will see your layers pallet. Click on the ying-yang looking symbol and this will bring up a list of adjustment layers. Choose "Levels".

This will bring up a box that looks like this:

Now drag the shadows slider to the right until it hits the edge of the hill (histogram). You will see your image getting contrast. Then move the midtones slider a little to the left or until your image is as bright as you want it to be.
After levels adjustment:
Now click on the ying-yang symbol again and this time choose "Hue/Saturation". You'll see a few different sliders here. Change the saturation from 0 to 20. You should see the colors in your image pop.
After saturation adjustment:

Now it's time for the last step, but first we need to flatten this image. Go to Layer>Flatten Image.

Now that the image is flattened, we are going to do some burning to the background to make the subject pop. I prefer to do this on a separate layer so hit "Command J" on a Mac or "Ctrl J" on a PC (correct me if I'm wrong there) to make a duplicate layer. I like to do this so if I go a little heavy on my burning I can simply lower the opacity of the layer later.
Now select the Burn tool. It looks like a hand. If you don't see it at first look for an icon that looks like an opaque magnifying glass (but NOT the magnifying glass that's an entirely different tool). If you click on the little arrow in the corner and menu will pop up and your burn tool will be in those tools. Now set the exposure of the burn tool to 30% and start painting over the areas of the image you want darkened.

After Burn tool:

This may be a tad heavy handed, but I wanted you to really see the difference.
And Voila! You're done!

Please let me know if you have any questions and I will do my best to answer them!
Did you like this tutorial? Would you like to see more? I really enjoyed writing this tutorial and since it's summer now and sessions have slowed, I would be happy to write some more. Let me know what types of tutorials you would want to see! Comment below!


 rss
rss twitter
 pinterest
 facebook


No comments:
Post a Comment